前言
有很多开源的动态博客框架,我们为什么要用静态博客框架呢?让我们先看看什么是Hexo
Hexo 是一个快速、简洁且高效的博客框架。Hexo 使用 Markdown(或其他渲染引擎)解析文章,在几秒内,即可利用靓丽的主题生成静态网页。
众所周知,白嫖让我们快乐,利用Hexo搭建的博客可以解锁更多的白嫖技巧(后续文章更新)
初始化博客
安装node.js
windows安装
- 前往node.js官网下载(推荐下载LTS版本)
- 按照安装提示进行安装(一定要选“添加到环境变量/ADD TO PATH”,这样会给后期减少很多麻烦)
- 安装Git
Linux安装
安装源里面的node版本(简便方法)
- debian/ununtu(需要管理员权限)
1 | apt install nodejs |
- centos
1 | yum install nodejs |
- 利用宝塔面板安装
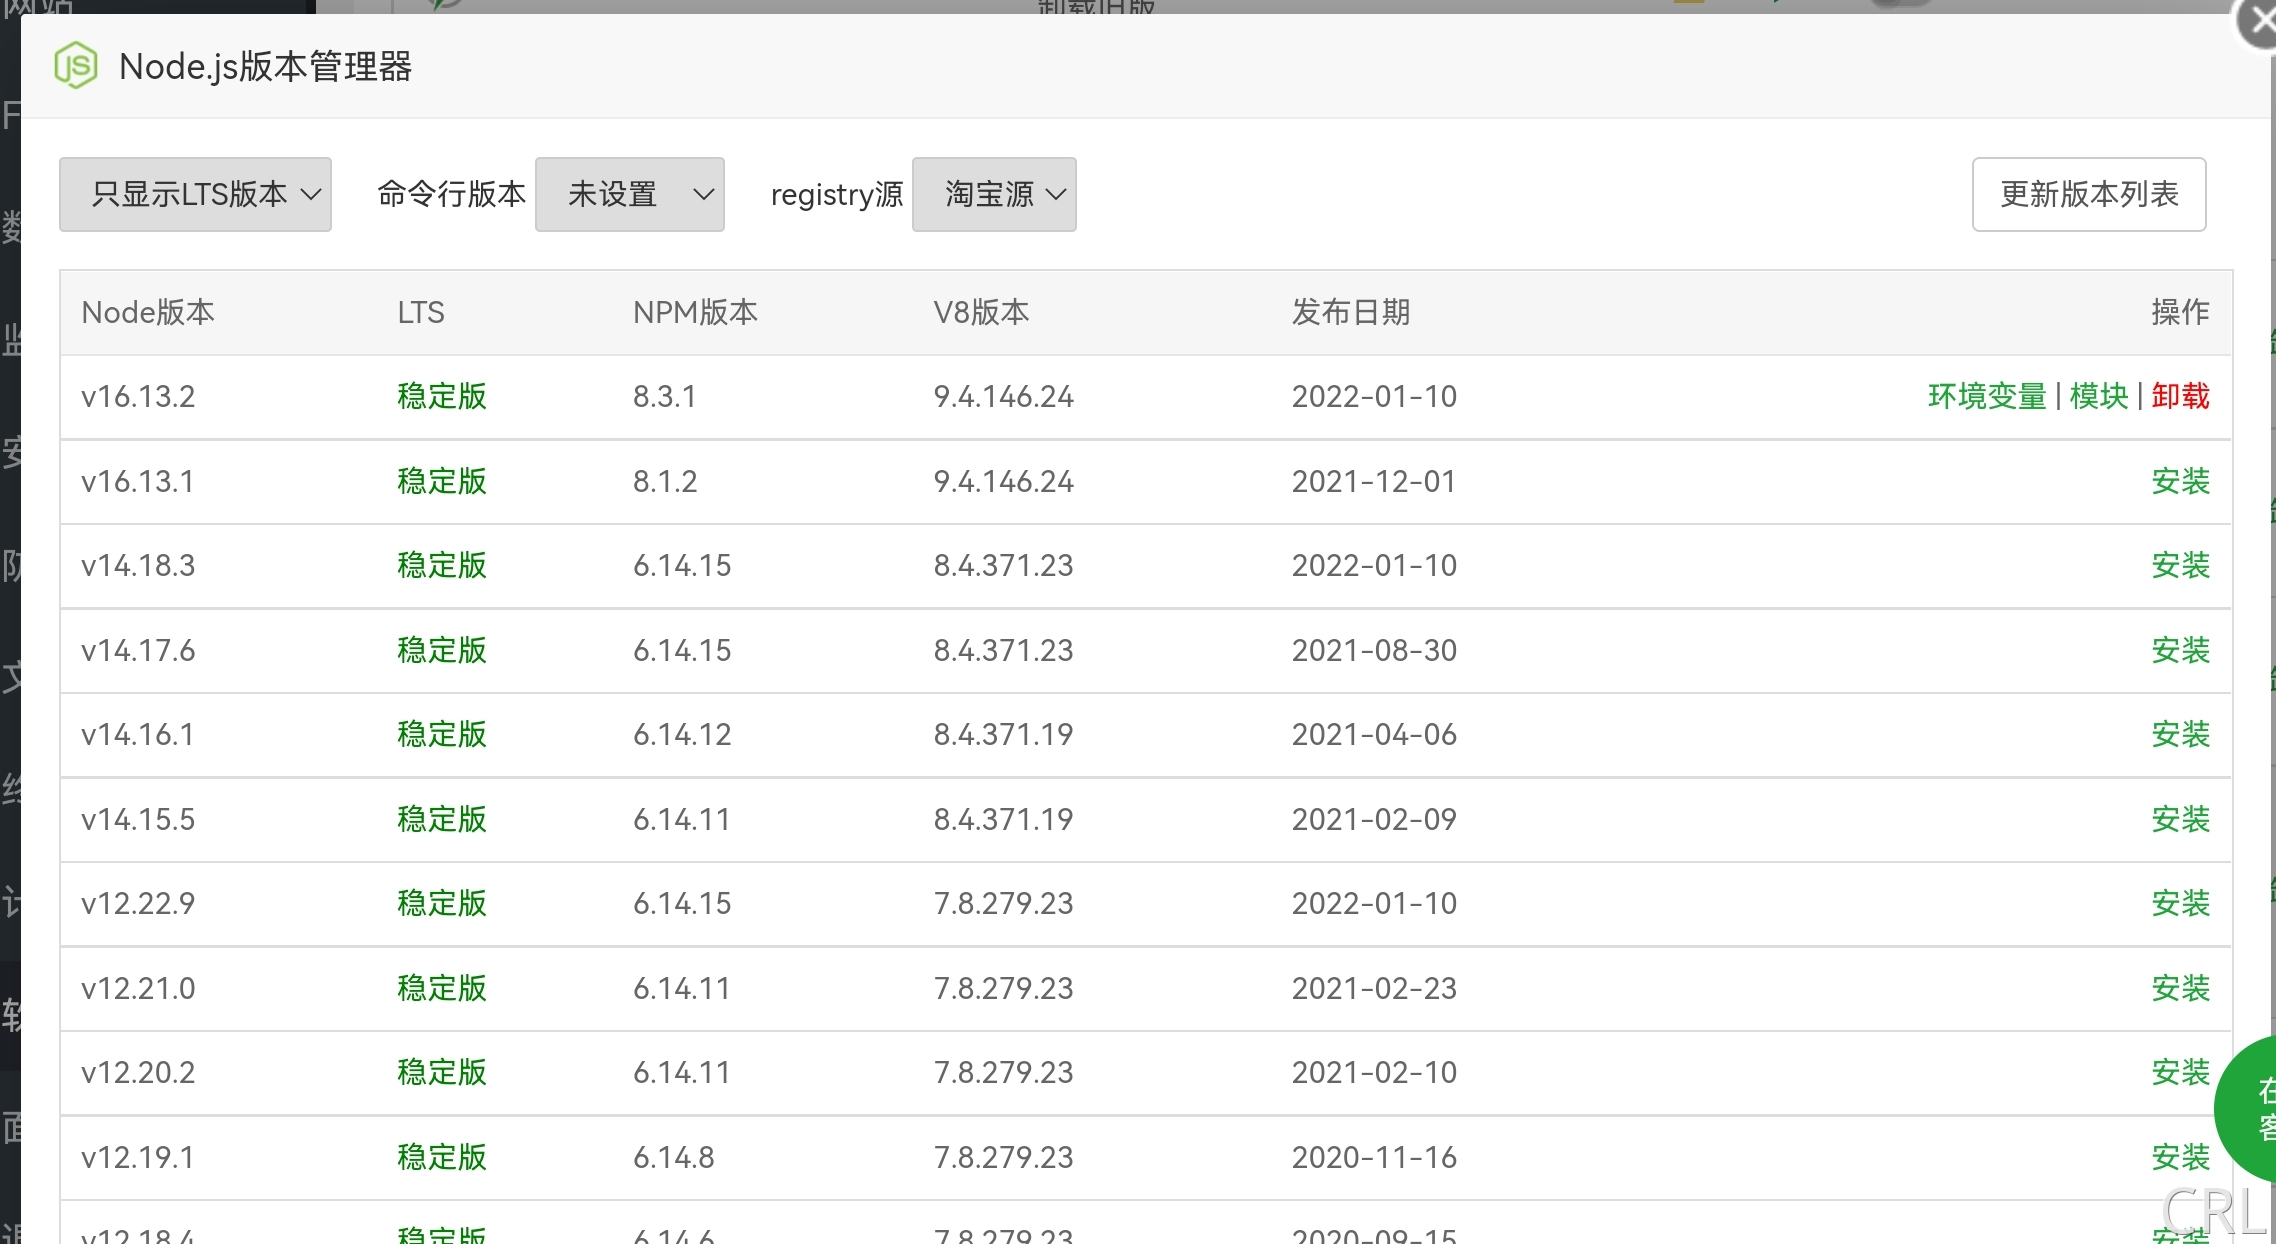
安装node管理器

选择任意一个版本(建议选一个长期支持版本,宝塔面板安装不好处理),可以使用<span class="ne-text">npx hexo使用</span>这样的安装方式需要自己添加环境变量
增加环境变量(需要管理员权限—Linux)
1 | echo 'PATH="$PATH:./node_modules/.bin"' >> ~/.profile |
docker安装
期待后续更新
安装hexo(推荐使用淘宝源)
1 | npm install -g hexo-cli |
这样,前期环境搭建就完成了
初始化博客根目录
1 | //选定一个你要存放博客的目录,在你选定的目录打开终端(windows用户请复制相对路径,在cmd里cd+进入目录) |
好了,就这样一个静态博客就初始化好了(可以通过http://localhost:4000/127.0.0.1:4000访问)

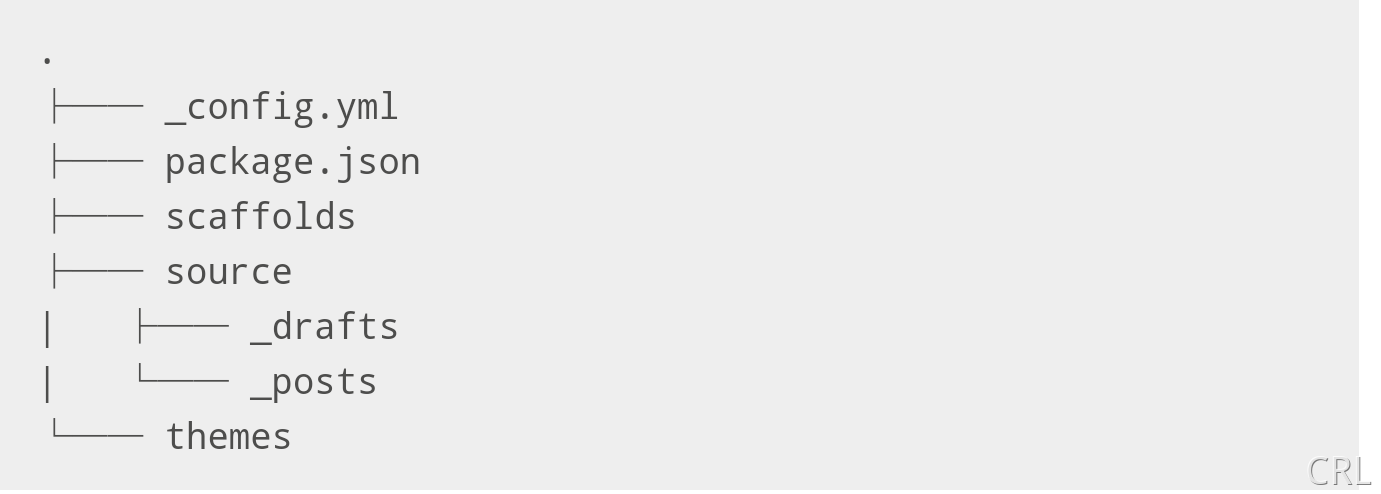
这是成功后的目录结构,期中_config.yml是前期用的比较多的
对于动态博客看起来会比较麻烦,但后期的备份,白嫖。迁移都有很大的优势。
选择主题
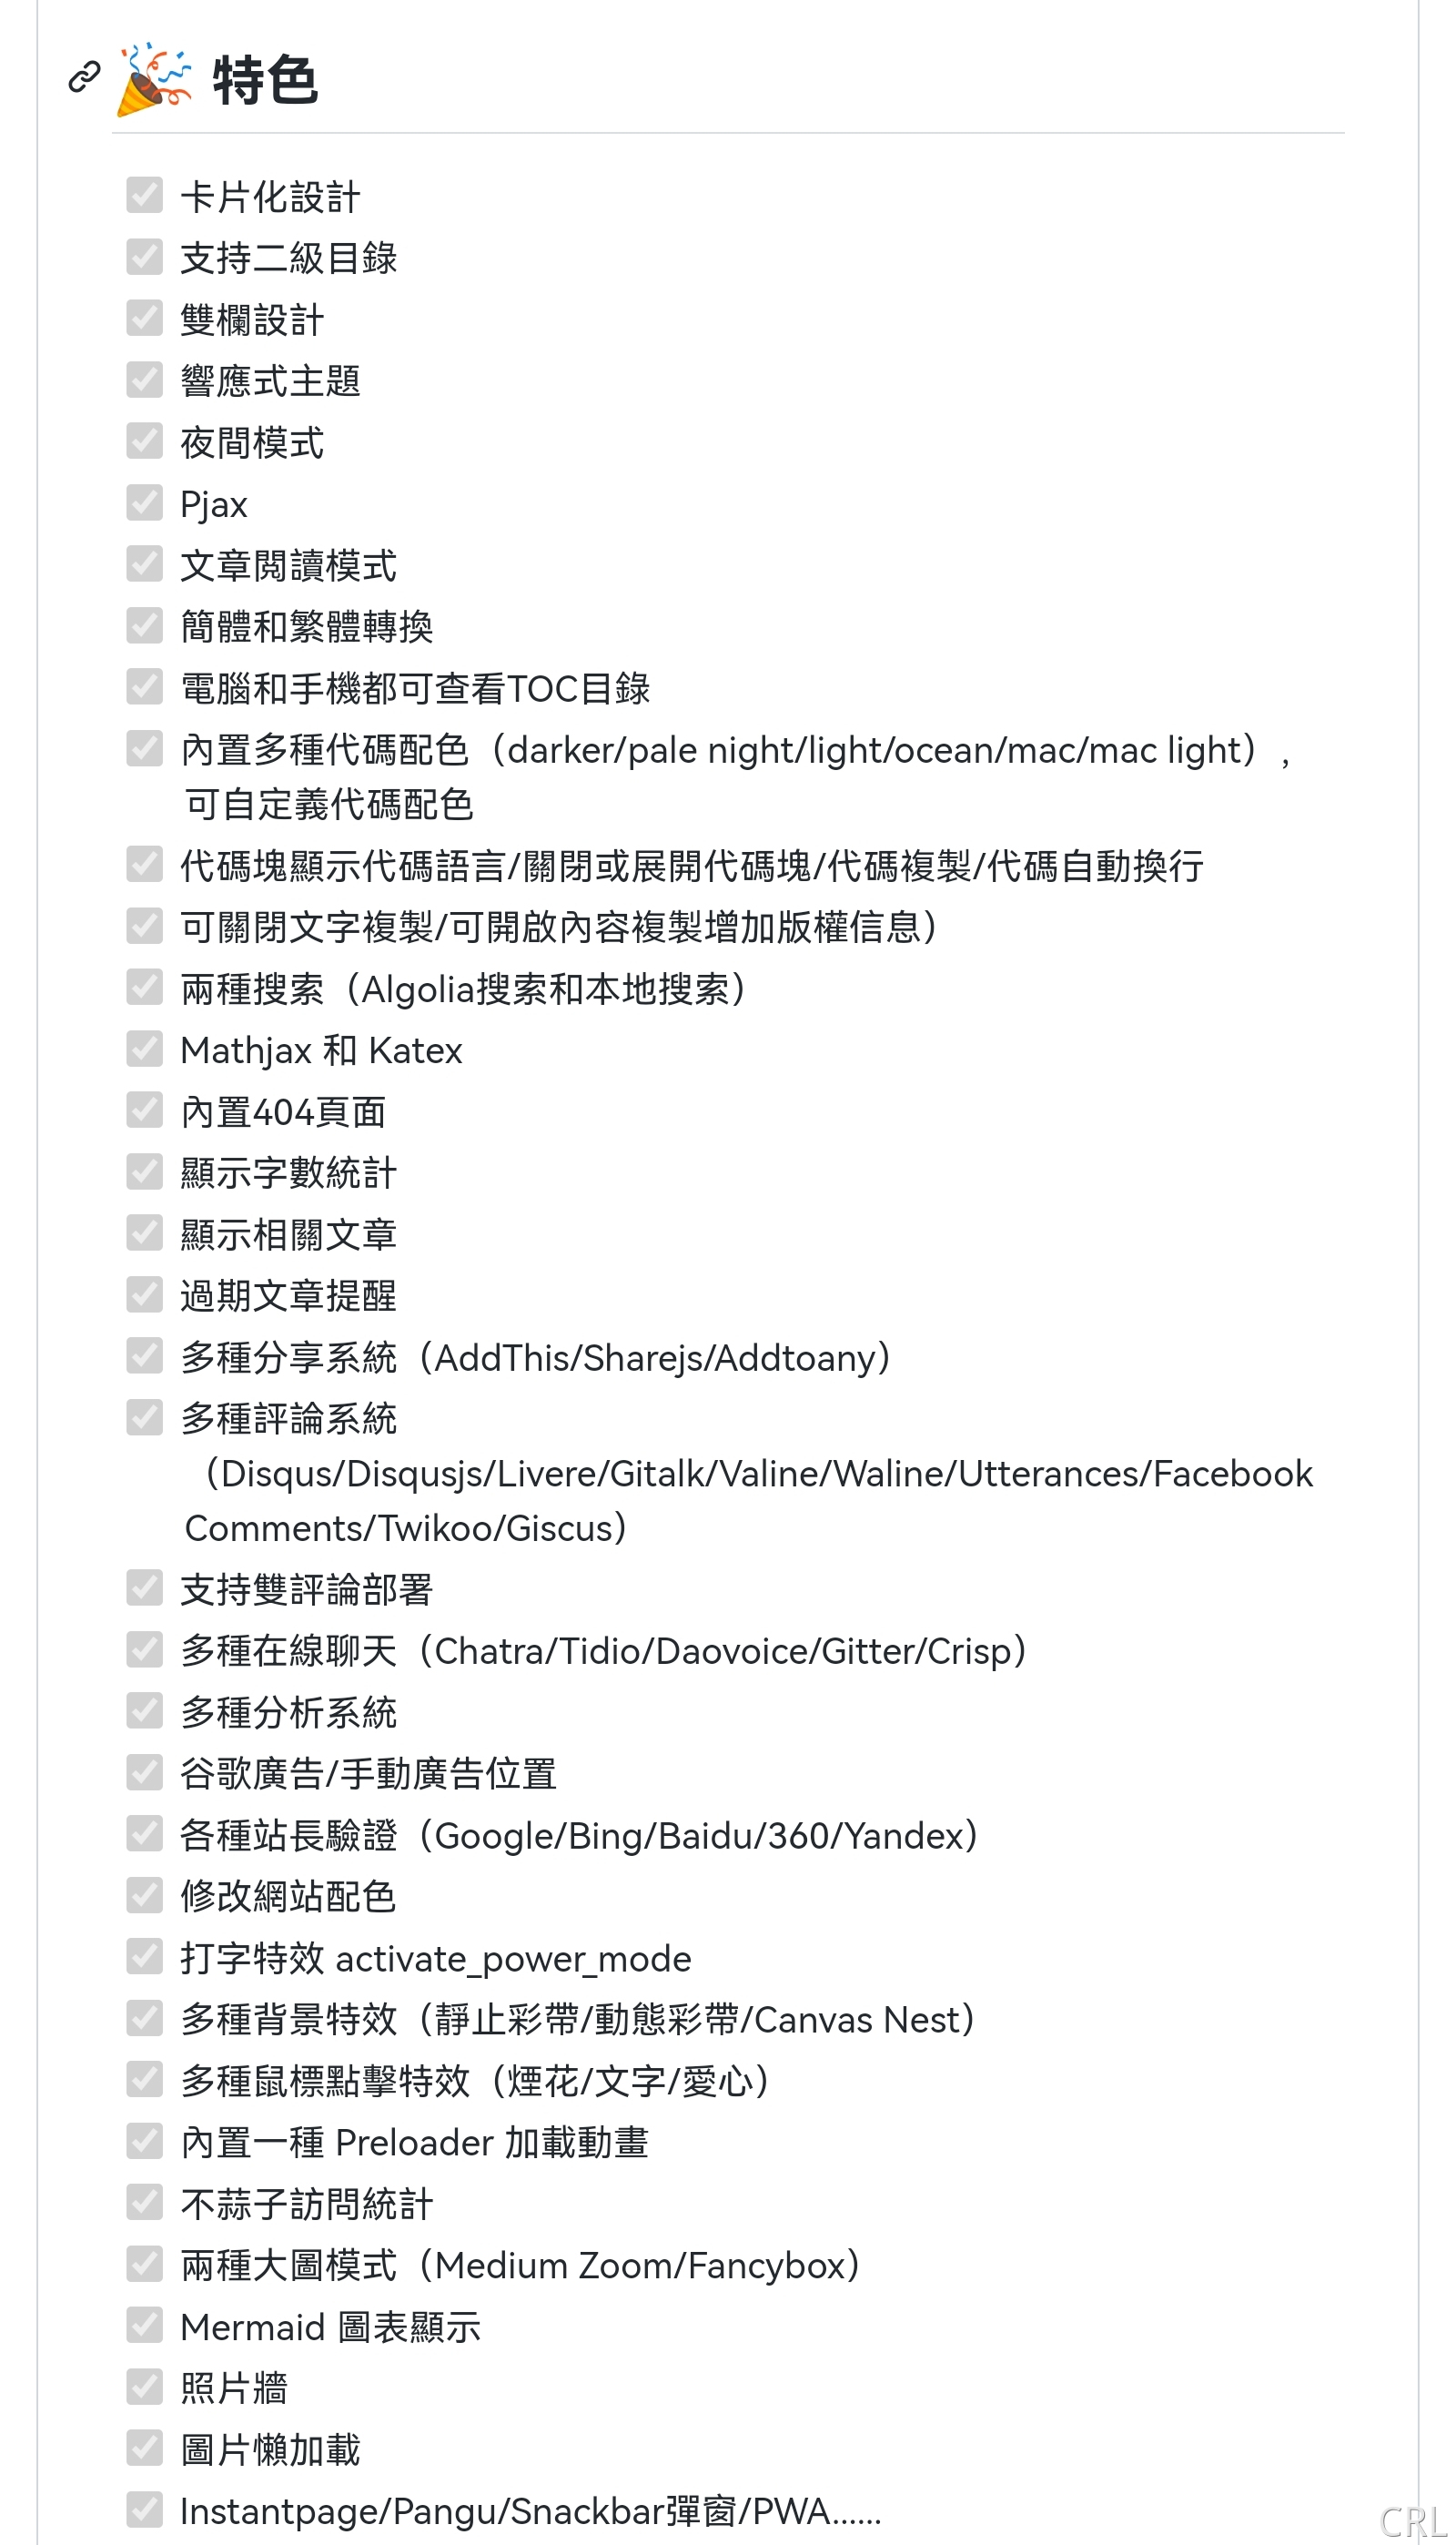
爱美之心人皆有之,谁不会想要一个好看的博客主题呢?本文推荐使用博主同款主题butterfly
什么是主题butterfly

获取主题(以下均在刚刚创建的博客根目录进行(/myblog))
通过git获取(需要提前配置好git)
1 | git clone -b master https://github.com/jerryc127/hexo-theme-butterfly.git themes/butterfly |
对于没有梯子的,可以采用本站提供的镜像github(任选一个使用)
1 | git clone -b master https://git.ypmsk.tk/jerryc127/hexo-theme-butterfly.git themes/butterfly |
通过npm获取
1 | npm i hexo-theme-butterfly |
需要手动将node_modules下的hexo-theme-butterfly复制到themes目录下
修改博客主配置,让主题生效
1 | # Extensions |
为博客添加身份(修改基础信息)
1 | # Hexo Configuration |
基础信息配置完以后,让我们一键三连
1 | hexo clean // npx hexo clean |
通过localhost:4000预览博客(关于端口修改上文已提及)
主题更新方法
为了方便主题更新,请将主题目录下的_config.yml(原文件不要删除!!!)复制到博客根目录下并改为_config.butterfly.yml
在hexo5.0以上,会自动合并两个配置,默认读取“_config.butterfly.yml”后续关于主题的魔改也会在这里修改
番外
番外1:利用语雀写文章
本站已有小白版教程(非自动版)
结尾
- 介绍安装Nodejs
- 安装hexo
- docker安装
- 选择主题
- 一键三连
- 简化后续主题更新
- 如何写作
- 主题魔改
- 白嫖进行时
- 安装插件
- 番外1:利用语雀写文章(非自动版)
- 番外2:利用qexo写文章
